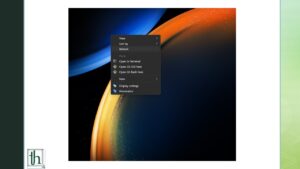
Want to open the full right-click menu on Windows 11 without needing to click on Show More Options? This article will show you how to do that. Windows 11 brings several UI/ UX changes that were mostly positively received. However, many people dislike the new right-click style on Windows 11. It’s minimalistic and very condensed.
The visual changes to the taskbar were all mostly well done, with rounded corners and a more modern design language overall that’s very consistent across the UI. The new Start Menu is different too, and the taskbar is at the center now, similar to macOS.
Also Read- Enable Mono Audio on Mobile and Desktop – Thetecheaven
The new right-click menu is part of this new approach. If you want to expand to the old style, you can click Show more options at the bottom. You can also use the keyboard shortcut Shift+ F10 to bring it up again. Many people find this new approach cumbersome and unnecessary. They felt it was just change for the sake of change and didn’t offer anything particularly useful.
An extra mouse click or extra keyboard shortcut to bring up the right-click menu is rather annoying. Microsoft doesn’t offer any official methods to disable this change. You cannot simply change it with a toggle. However, there are still ways to override it without using third-party software.
How to Open the full right-click menu by default on Windows 11
If you want to get past the Show More options hassle, you can do it through a manual override using Windows Registry. This will force the File Explorer to roll back to the older menu. You won’t need to modify any system files for this. As a result, you don’t have to repeat the steps whenever you get a Windows 11 update, and it will remain intact. There are two methods to do this. One of them involves the command line, and the other is the visual method.
Method 1: Open the full right-click menu by default on Windows 11 the Command Line method
You can run a simple command in PowerShell, and you only have to run one command line for this, and this is the fastest way to disable Show More options. You will get the full right-click menu by default in the File Explorer. After you run the command in PowerShell, you’ll have to restart your system for it to work.
Note: This override for the right-click menu is on a per-user basis. You don’t need to use an Administrator account for this. If you do it on one account, it won’t apply to another. You have to repeat the steps on the other account.
- Using the Start Menu, search for Windows PowerShell.
- Copy and paste the command below into the Windows Terminal. Then, press enter.
Command: reg add “HKCU\Software\Classes\CLSID\{86ca1aa0-34aa-4e8b-a509-50c905bae2a2}\InprocServer32” /f /ve - Now, it should give you a message that says, “The operation completed successfully.”
- You can now close the Windows Terminal.
- Restart the explorer process.
- Now, restart your system and check whether it expands the right-click menu by default.
Method 2: Using the Visual Method
If you don’t want to enter commands on Windows PowerShell, you still have some other options. You can click some different settings to change it. However, we recommend the Command Line method since it’s a lot simpler. This method is a lot longer and involves more steps. You will still get the right-click menu if you follow it through and restart your system afterward.
- Start the Registry Editor. You need to execute some Regedit commands. You need to execute the Regedit command in the Run prompt, and the application will open.
- Go to HKEY_CURRENT_USER\SOFTWARE\CLASSES\CLSID\ using Control+ F since it’s easier that way.
- Create a new registry key.
- The name of the new key should be {86ca1aa0-34aa-4e8b-a509-50c905bae2a2}
- Now, create another registry key that’s called InprocServer32. Make sure it’s under the previously created {86ca1aa0-34aa-4e8b-a509-50c905bae2a2}.
- Find the (Default) key in InprocServer32.
- Set the value of this key to Blank, and click OK on the prompt.
- Close the registry editor and restart the explorer process.
- Restart your system, and the changes should take effect.
How to re-enable the default compressed right-click menu
You have two options if you want to re-enable the normal Windows 11 right-click menu.
Method 1: Open the Registry Editor and delete the {86ca1aa0-34aa-4e8b-a509-50c905bae2a2} key. This will also include the InprocServer32 subkey. Restart your system after this, and you should get the original right-click menu back.
Method 2: Open the Windows Terminal. Execute the command line mentioned below:
reg delete “HKCU\Software\Classes\CLSID\{86ca1aa0-34aa-4e8b-a509-50c905bae2a2}” /f
After executing this one-line command, restart your system for it to take effect.


