Windows 11, the latest operating system from Microsoft, brings a host of new features and enhancements. However, like many OS releases, it comes with preinstalled applications, often referred to as bloatware. While these applications may serve a purpose for some users, many prefer a more streamlined Windows experience without unnecessary clutter. In this guide, we will walk you through the steps to install Windows 11 without bloatware or preinstalled apps. This method allows you to have a fresh Windows 11 installation, free from unwanted applications.
Check Out: 8 Compelling Reasons You Might Want to Avoid Apple Pay
The Issue with Bloatware
When you first install Windows 11, you may notice that the OS includes several preinstalled apps. These apps can vary depending on your region and often include software like Spotify, Netflix, Candy Crush, Prime Video, Messenger, Xbox, Twitter, and more. While some users find these apps useful, many consider them unnecessary and would rather have the choice to install them themselves if needed.
Uninstalling these preinstalled apps might seem like a solution, but it’s temporary. Windows 11 often reinstalls these apps through the Microsoft Store during OS updates, which can be frustrating for users who want more control over their system.
The Solution: Installing Windows 11 Without Bloatware
Fortunately, there’s a workaround that allows you to install Windows 11 without bloatware or preinstalled apps. Follow these steps to achieve a clean Windows 11 installation:
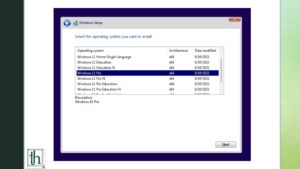
- Start the Windows 11 Setup as usual, selecting your preferred language and region.
- When you reach the “Time and currency format” drop-down menu, choose either “English (World)” or “English (Europe).”
- Click Next and follow the on-screen instructions to continue the installation.
- As the installation progresses, you may encounter the “Something went wrong OOBEREGION” error. When this error appears, simply click Skip to proceed.
- Complete the remaining installation instructions until the process is finished.
- Once the installation is complete, your PC will boot into Windows 11 without any of the preinstalled bloatware apps.
- If you wish to return to your original region settings, navigate to Settings> Time & Language > Language & Region > Country or Region, and select your desired region. Rest assured, the bloatware apps will not be reinstalled.
Conclusion
By following these steps, you can enjoy a cleaner Windows 11 experience without the annoyance of bloatware or preinstalled apps. This method offers users greater control over their operating system, ensuring that unwanted software does not clutter their system.
If you have any questions or encounter any issues while following these steps, feel free to leave a comment, and we will provide assistance. Enjoy your bloatware-free Windows 11 experience!


