Although there isn’t a built-in screen recorder in Windows 11, there are numerous third-party apps that let you record the screen in Windows 11 while also including audio recording, a webcam view, and other features. But what if you want Windows 11 to only record audio? Windows 11 has not stumbled in this area and has released a native Sound Recorder software that enables you to smoothly capture audio. You can import recorded audio files, select the bitrate, and save the recorded audio in a variety of media formats with the program. In light of the above, refer to this detailed tutorial to discover how to capture audio in Windows 11.
The audio recording in Windows 11
Two quick techniques to record audio in Windows 11 have been included. To record sound on Windows 11, you can either use the in-built Sound Recorder app or a third-party program like Audacity. But before, make sure to read our instructions on how to configure and test the microphone in Windows 11.
1. Utilize Windows 11’s native sound recorder app to capture audio.
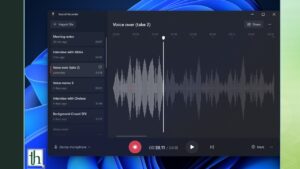
Unbeknownst to you, Windows 11 has a built-in Sound Recorder software that performs admirably and is simple to use. The UWP-based Voice Recorder app by Microsoft was only recently upgraded. It now goes by the name Sound Recorder app and features a new design aesthetic that matches Windows 11’s appearance.
The fact that Windows 11’s new Sound Recorder program now allows recording in a variety of formats, including MP3, M4A, WAV, FLAC, and more, is its strongest feature. Not to mention, you have a range of options for the audio quality, from auto, medium, and best to high. The software also allows you to change the microphone, which is a nice feature. So go ahead and try the built-in Sound Recorder app if you want to record sounds on Windows 11. Use it as follows.
- First, type “voice” or “sound” by pressing the Windows key. Select “Sound Recorder” or “Voice Recorder.”
- The program will then automatically update to the most recent Voice Recorder version. If, for some reason, the program is still the outdated version, click this link to update it through the Microsoft Store.
- Open the Sound Recorder app at this point. You can select the recording device from the drop-down menu at the bottom-left corner. The big red “Record” button at the bottom can now be clicked to begin audio recording. Click on the same button once again to halt the recording. The button will now be a red “Stop” button.
- After that, you may quickly locate the file by performing right-clicking on the recorded audio and selecting “Open File Location.”
- Windows 11 stores the audio recordings in the “user profile -> Documents -> Sound recordings” folder.
- Additionally, you can use the three-dot menu in the bottom right to modify the playing speed and add timestamps to the audio intervals.
- Open the app’s “Settings” to modify the recording quality in Windows 11. The three-dot menu is located in the bottom right corner and provides access to the Settings as well. You can select your preferred audio format here. So, here is how you use the Sound Recorder app in Windows 11 to capture audio snippets.
2. Record Audio with Third-Party App Audacity in Windows 11.
Let me introduce you to Audacity in case you’re looking for a sophisticated tool to record audio in Windows 11. Considering the extensive number of features, it is considered to be among the greatest Windows 11 apps. System sound, audio being broadcast over the speakers, microphone audio, etc. can all be recorded. The fact that Audacity is open-source and totally free to use is the nicest aspect. Thus, this fantastic audio recording program may be used by both amateurs and experts. Here’s how to record audio in Windows 11 using Audacity.
- Download Audacity from this website by clicking on it. Additionally, the Microsoft Store on Windows 11 allows you to install Audacity.
- Open the audio recording app after installation to get started. You can first select the input source for audio recording next to the microphone symbol at the top.
- Lastly, press the red recording button up top. Click the grey “Stop” button to end the recording.
- Now you can play the recording by clicking the green play button. In addition to mixing, reducing noise, trimming, adjusting speed, etc., you can also edit the audio recording.
- To save the audio recording, select “Export” from the “File” menu. Choose the file format you want to use here.
- There it is after selecting the folder to save the audio recording too. You may explore all of the possibilities with Audacity in the app. But this is how you can use a third-party tool like Audacity to record audio with Windows 11.
Checkout- How to Change the Default System Font on Windows 11
In Windows 11, there are so two methods for recording sound. Although the built-in Sound Recorder program is fantastic, Audacity is an option if you want more functionality. Finally, let us know in the comments section below if you have any queries.


